
Irrigation Options
Various Dripperline Layouts
for Raised Beds & Containers
Various Dripperline Layouts
for Raised Beds & Containers
Garden Tip
TB1270
TB1270
Technical Bulletin Series
|
|
Irrigation Options Various Dripperline Layouts for Raised Beds & Containers |
Garden Tip TB1270 |
Technical Bulletin Series
|
Because there are a number of ways to provide water for a raised bed
it can make water requirements or planning more complicated. So, the
Garden Calculator Pro-I makes a significant prerequisite; supply enough
the water to the raised bed in order to provide adequate moisture to ALL
of the bed with sufficient depth. This assures that no matter the location
of any single plant, all will have maximum root growth and moisture.

Though the placement of individual plants may only be in a few rows,
their roots will continue to expand, and the plant will subsequently
grow and thrive if soil moisture is uniform throughout the bed. If there
are portions of the bed that are not intended to be used, then do not
include those areas in the dimensions that you input.
|
|
Uniform and even water distribution is the GOAL. |
|
CONTAINER PLANTS 
There are so very many ways that a Creative Gardener may decide To plant into a Container or Pot - it might seem silly to even recommend ANY standard approach or method for irrigation. |
|
Thing is, that we really can find a common starting point for irrigating
these Containers and Pots. What each "Garden Pot" application has in common
is that we want every cubic inch of potting/succulent soil to be thoroughly
wetted following a single irrigation cycle.
Too often, only a little water is applied to a container plant with the thought that the plant inside does not need much water. Never; just wet the surface soil! Whether the plant is a very drought tolerant succulent or a regular water user, "vary the time in between waterings - not the amount of water!" |
|
When you irrigate; thoroughly moisturize the entire soil volume for the root system.
If you don't - you are wasting the soil space in the pot and assuring that the roots
will stay small and relatively undeveloped.
Because the goal is to provide an even distribution of moisture throughout the total soil structure within the pot or container, we need to know the type or composition of that soil, and its' cubic volume in order to determine how much water to apply. Then we need to use an irrigation method that provides even distribution of water throughout the total soil structure. Potting soil is the most common type of grow media used in a garden container and typically will require 1 gallon of water for every 2.2 cubic feet of potting soil for saturating "ready-to-water" soil. Completely dry soil will require a little more but generally we should irrigate before the soil is completely dry.
So, now we know how much water to apply!
|
|
The next question is "How to do this, and make sure the water/moisture permeates the soil evenly, doesn't flood out to the edge and drain away. Also, doing this easily and quickly would be great.
There are many different types of irrigation emitters to choose from. Garden Tip TB1150 gives an introduction to some of the most popular along with Pros-and-Cons. Dripperline (a product with the emitter built right into the feeder tubing) provides a great solution, is easy to install and is actually more economical than most other types of irrigation emitter types. 
|
|
Putting it all Together
We know how much water to provide, and we know a great tool for providing that water;
now the final piece of the puzzle is selecting the right control device.
Irrigation timers provide the easiest method for assuring we get the amount of water we want for each plant. Naturally, there will likely be some plants (on the same timer/controller) that need more or less water than others. This can be accomplished by providing more or fewer emitters. Dripperline with 6 inch spacing is usually best for containers, so a 3 foot section would provide 6 emitters, while a 1.5 foot section just 3. By cutting the Dripperline to the right length (plugging the end) we can provide a large variety of water-volumes even though they all run at the same length of time. You can choose from battery-power controllers or line voltage type. Some simply connect to a hose bib coming from your tap water system. |
|
Because potting soil and Raised Bed soils are more porous than most landscape soil, the spacing between emitters should be less (more emitters per square foot) which helps to assure even and thorough distribution. Occasionally inspect your controller to make sure it works properly, and seasonally set it correctly for the days-per-week required. Then leave it to do its' job. Seasons change and so will watering schedules. Once to three times a year. Instead of giving a complex answer, my goal is to give a simple one that applies to most-every application involved. |
|
RAISED BED GARDENS |
|
|
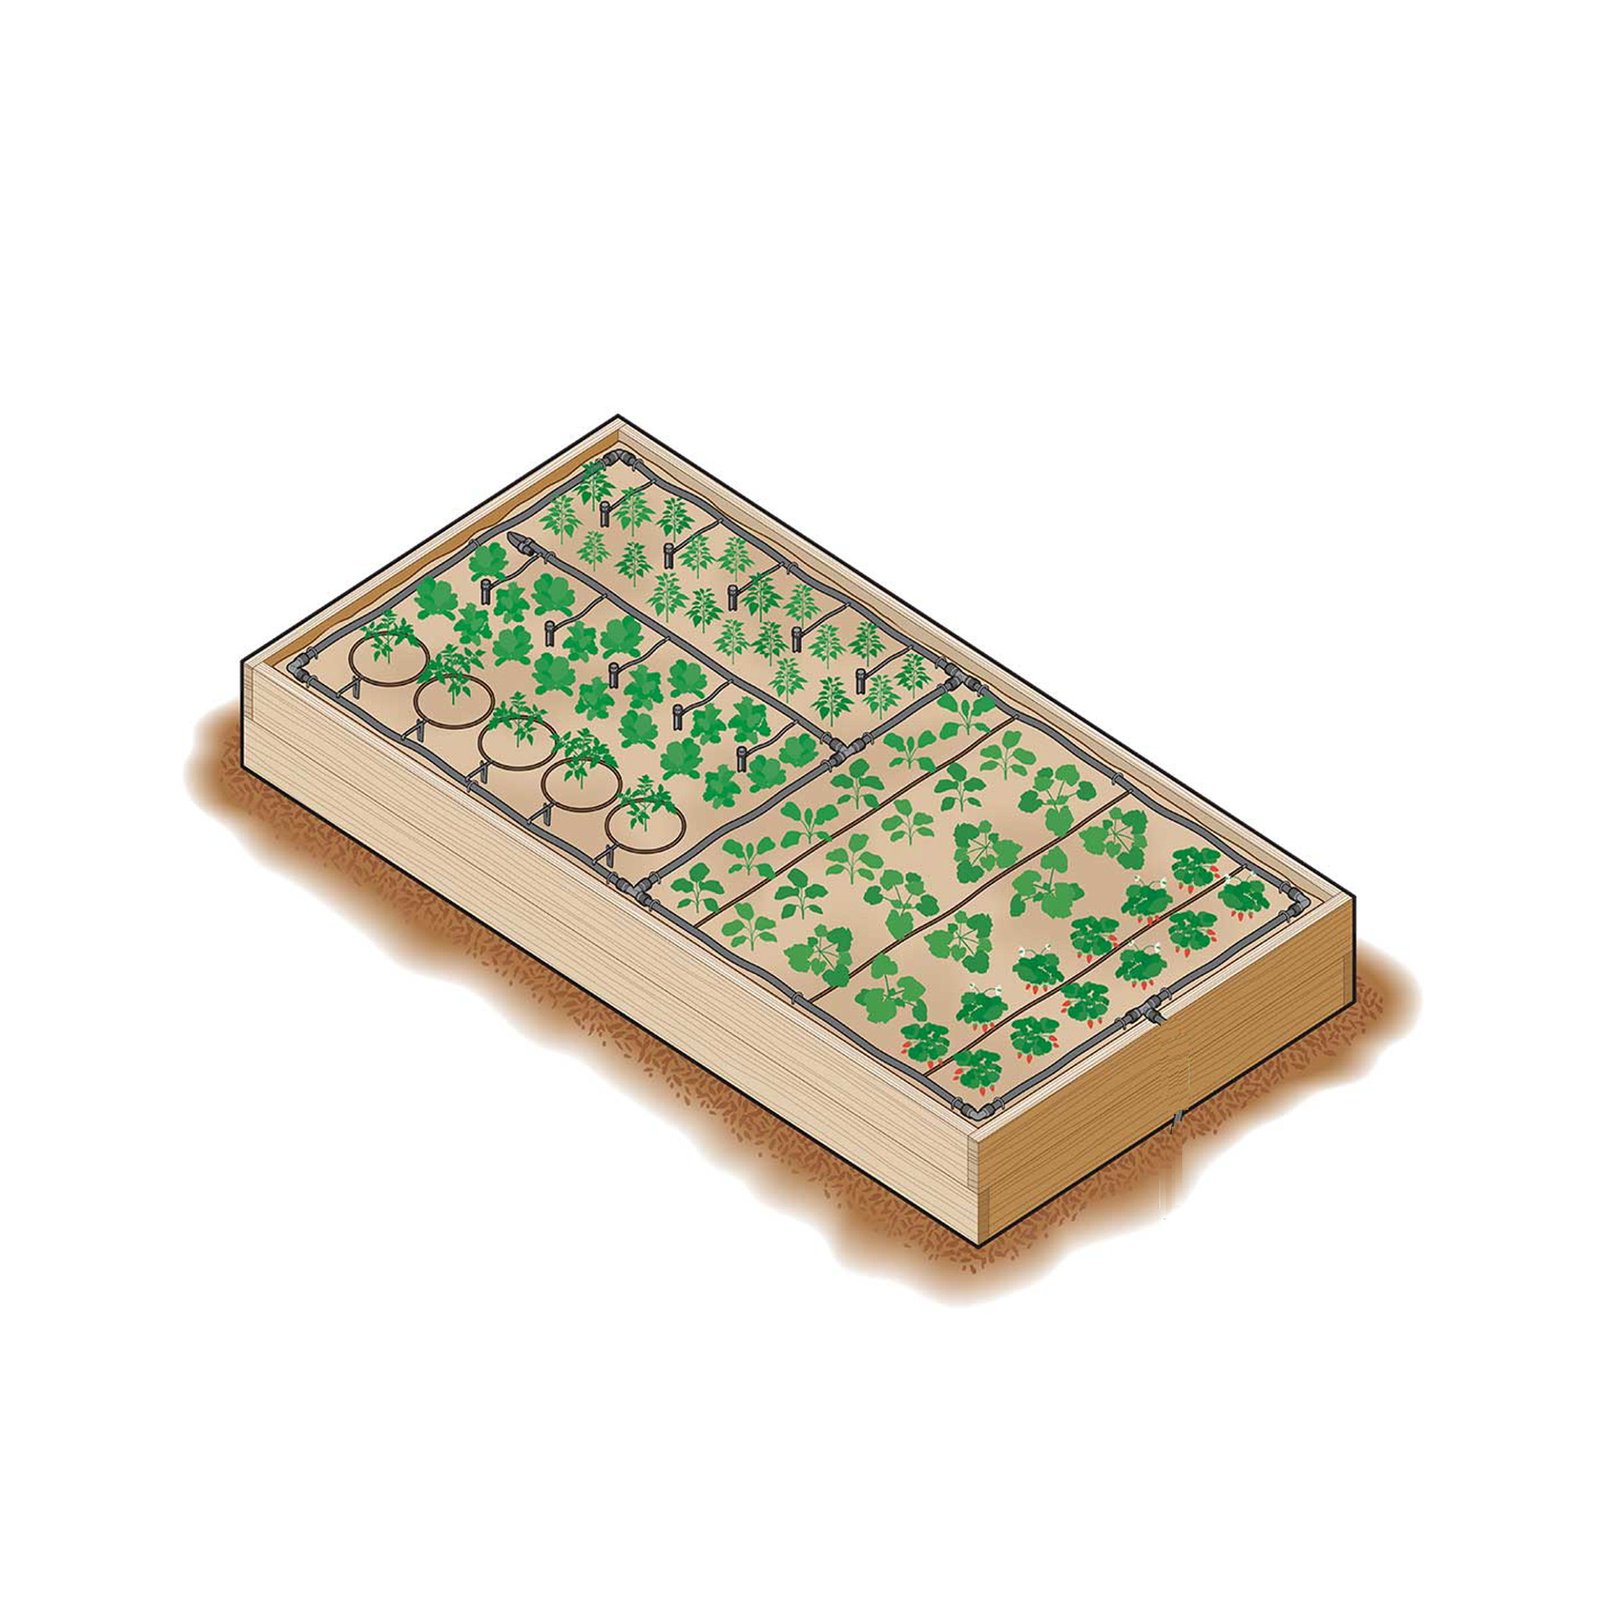
In this example, we see a combination of various plants being provided a variety of irrigation drips:
some have watering rings, others variable-flow shrubblers
and yet others given rows of dripperline.
The fact that these often have different or varying flow rates,
makes the system complex and prone to over or under-watering.
The complexity of this layout can make it difficult to provide uniform moisture as dripperline and shrubblers have such different flow rates. |
|
|
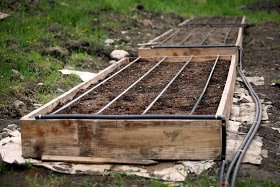
This design is set for more even distribution, but emitter spacing may require that plant placement is conditional;
the plant roots will need to be placed near the soaker hose to assure adequate moisture when the plant is young.
New plants have smaller root systems and need the near-surface moisture to be within 3 to 4 inches of the plant. Once a plant is established this need not be an issue, but if it isn't intended to hand water for the first three to four weeks - this dripperline spacing might not be the best option. |
|
This is a common layout recommendation, but look at how far apart the hoses are! 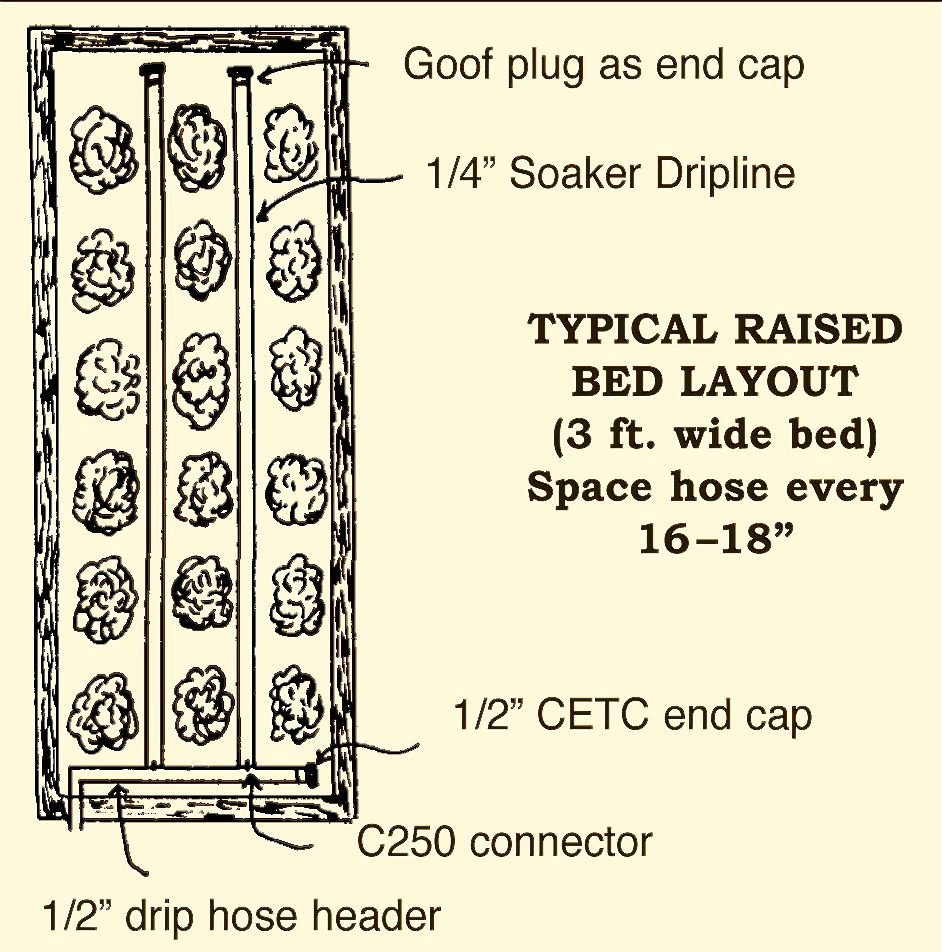
|
If you have the option to "start from scratch",
you might want to consider a simpler layout where the goal
is uniform moisture through out the bed.
The "Garden Calculator Pro" will show
that the cost of water for this design is not excessive.
|

|
|
The example above shows the lines spaced by 6 inches,
and the emitters in those lines off-set so that one emitter
is NOT directly across from the other.
This technique provides a moisture point no further than 7 inches apart.
Meaning that no matter when a new plant is installed,
the middle of its' roots will be within 3.5 inches of any moisture point.
|
Whether your choice is the use of spray shrubblers or dripperline,
keeping to the principle of distributing the water evenly throughout
the Rootzone area is essential for the current and future health of the plant.
A section of dripperline with 6 inch spacing running for 10 feet costs approximately $1.80. In the image above we see that the use of this type of dripperline in a Raised Bed can facilitate excellent uniform moisture distribution around a new plant. Due to its' low cost this represents a very economical method for providing a top quality irrigation system. |